One of the few printing features that cannot be directly controlled using a Tray Selector profile is duplex printing, double-sided printing or two sided printing. Most users simply want to click a button in Word to either print single sided or double sided (duplex). This short blog article shows how to set this up with Tray Selector.
Following these steps and instructions will illustrate how to print Duplex using Tray Selector.
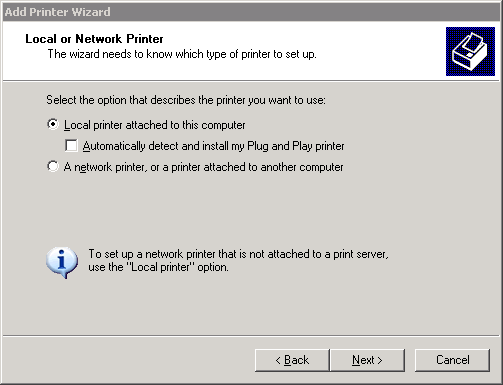 In this example we need to choose the option for installing a local printer, based on the settings noted in the first step.
- Step 1 > Take note of your printer model and it’s port setting
- Step 2 > Install a new 2nd printer driver that points to the same physical printer
- Step 3 > Configure this new 2nd printer driver so that it prints everything duplex
- Step 4 > Install the printer on the client PC (if required). Further help her
- Step 5 > Create a new Tray Selector button named duplex that points to this printer
- This example is for a network printer that is shared out from a server. We use an HP LaserJet printer in this example but the same process can be used for other printer types.
- If the printer in question is shared via a PC or server, then these steps need to be carried out on that PC or server.
- If the printer is either physically connected to your PC, or accessed directly from your PC across the network using it’s IP address, then steps 1,2,3 and 5 only need to be carried out on your PC
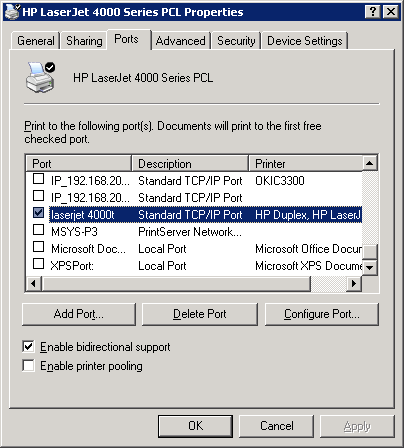
Step 1: Take a note of your printer model and port setting
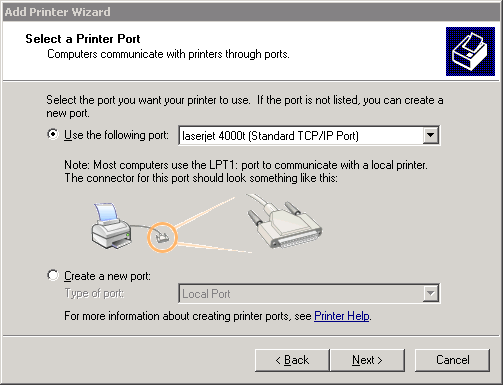
Within the printers folder, right click on the existing printer icon, and choose Properties and then click on the Ports tab. The dialogue box should look something like this:
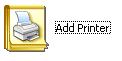
Step 2: Install a double-sided printing 2nd printer driver that points to the same physical printer
- Double click the Add Printer Icon
In this example we need to choose the option for installing a local printer, based on the settings noted in the first step.
- Select Use the following port and choose the option to match the one noted from the existing printer.
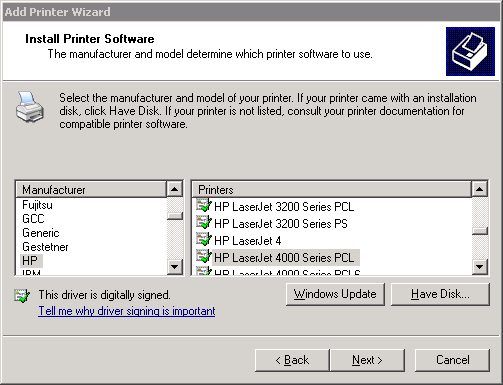
- Choose the manufacturer and printer model from the lists. Again this should match the printer model you noted at the beginning. You may need to install a new driver but if you already have a driver for this printer installed for single-side printing then you probably don’t need to again for duplex printing.
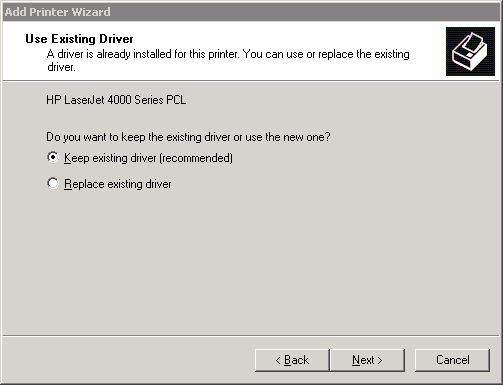
- Choose to keep the existing driver.
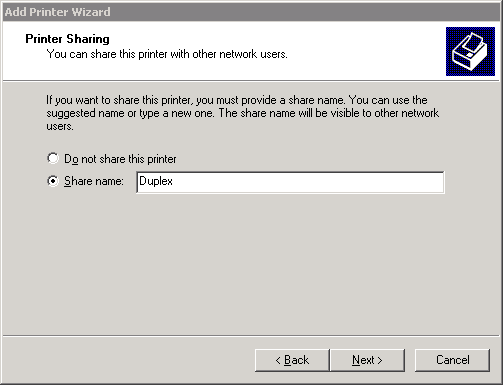
- Give your printer a name that will differentiate it from the existing one. In this example it’s called Duplex for duplex printing.
- If this printer is to be used by other users, then you need to give it a share name, again I have called this one Duplex.
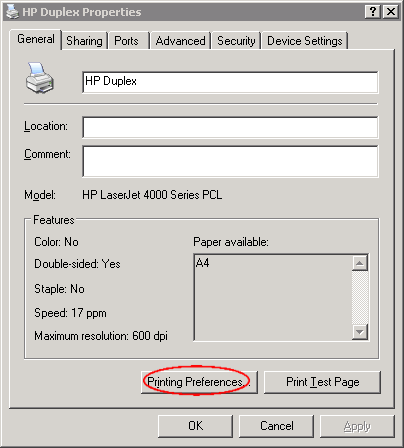
Step 3: Configure this new 2nd printer driver so that it prints everything duplex
- Click on Printing Preferences

Using options found on the wizard that follows choose the method of duplex printing you require.
The look and position of this option will vary between different printer drivers, but basically what you are trying to achieve is that everything sent to this printer driver will print double sided and in most cases it will be flipped on long edge.
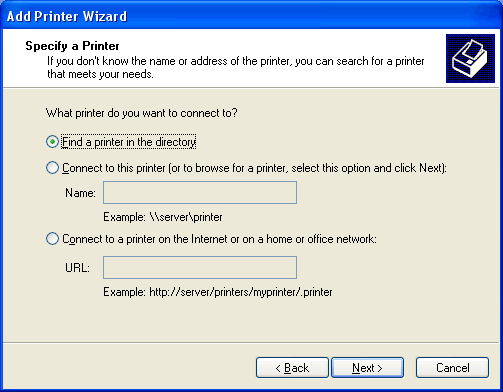
Step 4: Install the printer on the client PC (if required)
This process has created a shared network printer that prints all documents double sided. You then need to set this up as an available printer for all users that require it.- Do this by clicking Add Printer
- This time choose Network Printer
- If the printer has been shared out from a Windows server then you will need to choose Find printer in the directory.
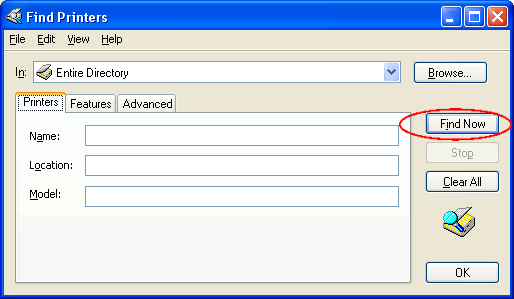
- Choose Find Now
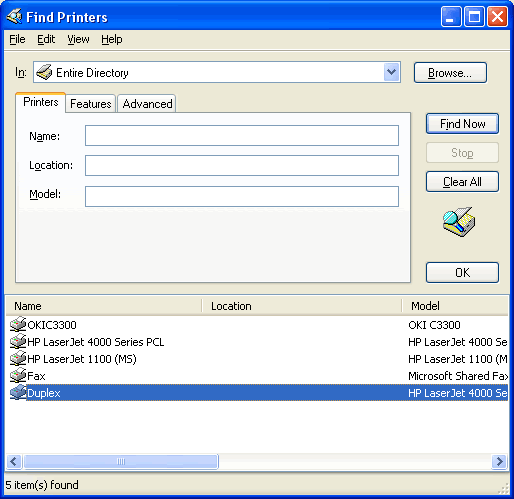
You should now see your printer names Duplex appear in the list, as shown above. Double click on this printer, to install it.
 You now have a Duplex button on your Tray Selector ribbon bar. When you click it all your output will be printed two sided. There is no need to change your printer each time within word to keep directing your print jobs to a different printer driver. Just click the Duplex button on the Tray Selector ribbon and all your print jobs will be sent to this printer.
You can download a free trial of Tray Selector here.
Using this same technique you can add new printer drivers for other capabilities that your printer might offer e.g. stapling or other multifunction printer capabilities.
Further help on installing printers in windows can be found here.
A guide to duplex printers for your law office can be found here.
You now have a Duplex button on your Tray Selector ribbon bar. When you click it all your output will be printed two sided. There is no need to change your printer each time within word to keep directing your print jobs to a different printer driver. Just click the Duplex button on the Tray Selector ribbon and all your print jobs will be sent to this printer.
You can download a free trial of Tray Selector here.
Using this same technique you can add new printer drivers for other capabilities that your printer might offer e.g. stapling or other multifunction printer capabilities.
Further help on installing printers in windows can be found here.
A guide to duplex printers for your law office can be found here.
Step 5: Create a new Tray Selector button named Duplex that points to this printer for two sided printing
Within Tray Selector you can then create a profile (button) called Duplex that points to this new printer and driver. This will then add single click two sided printing capability to your existing Tray Selector buttons.
You now have a Duplex button on your Tray Selector ribbon bar. When you click it all your output will be printed two sided. There is no need to change your printer each time within word to keep directing your print jobs to a different printer driver. Just click the Duplex button on the Tray Selector ribbon and all your print jobs will be sent to this printer.
You can download a free trial of Tray Selector here.
Using this same technique you can add new printer drivers for other capabilities that your printer might offer e.g. stapling or other multifunction printer capabilities.
Further help on installing printers in windows can be found here.
A guide to duplex printers for your law office can be found here.